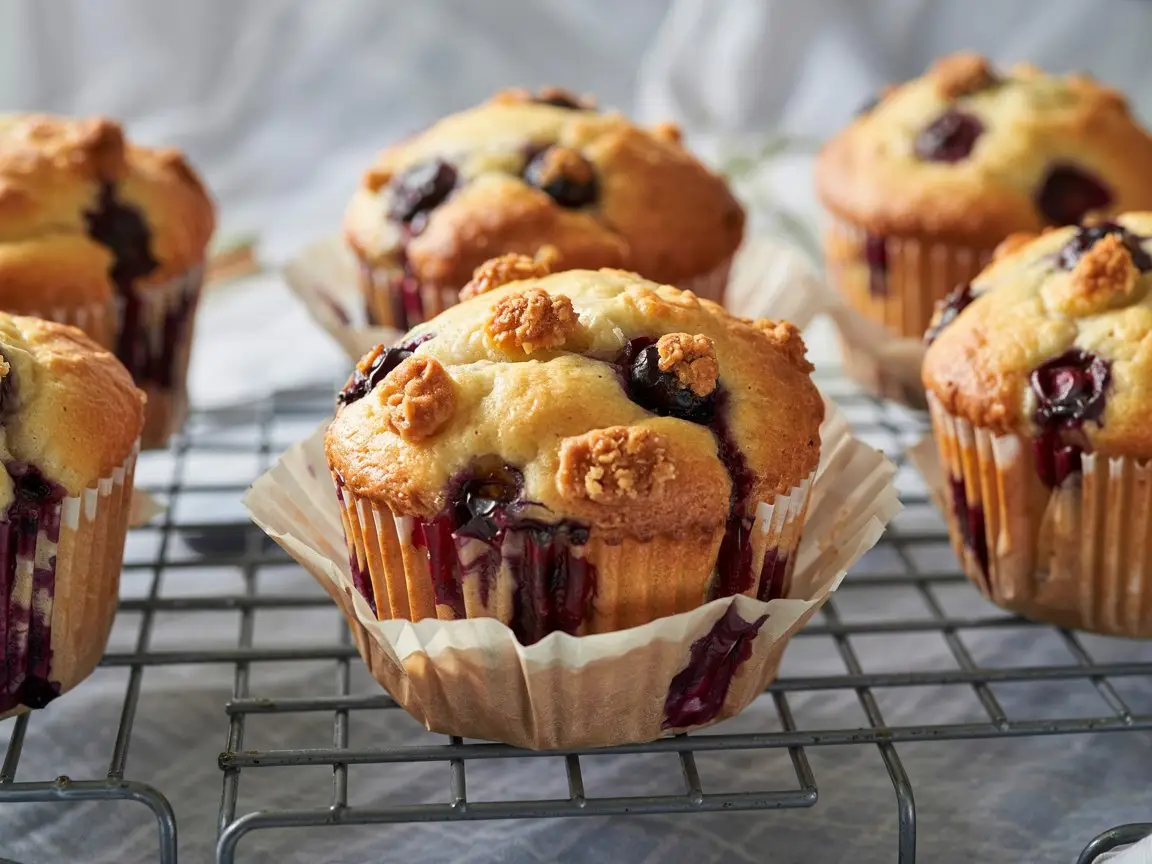

Is there anything better than a soft, fluffy blueberry muffin with a beautiful golden dome? Honestly, I don’t think so. There’s just something so comforting about pulling a tray of homemade muffins out of the oven and seeing them look like they came straight from a bakery.
I’ve tried a lot of blueberry muffin recipes over the years, and while many were good, they didn’t always give me that classic bakery feel.
But after a few tweaks (and more than a few taste tests), I finally found the magic. These muffins are tall, tender, loaded with juicy blueberries, and topped with a light crumb that makes them absolutely irresistible.
If you’re craving that perfect bakery-style muffin that feels special but is easy enough to whip up on a regular morning, you’re going to love this recipe.
Let’s jump in and make some muffin magic happen.
What You’ll Need
For the Muffins:
- 2½ cups all-purpose flour
- ½ cup cornmeal (optional, but it gives a lovely texture)
- 3 teaspoons baking powder
- ¼ teaspoon baking soda
- 1 teaspoon ground cinnamon (optional)
- ½ teaspoon salt
- ⅓ cup salted butter, melted and slightly cooled
- ⅓ cup vegetable oil
- 1 cup granulated sugar
- 2 large eggs, room temperature
- 1 teaspoon vanilla extract
- 1 cup whole milk, room temperature
- ⅓ cup full-fat sour cream, room temperature
- 2 cups fresh or frozen blueberries
For the Crumb Topping:
- ¾ cup all-purpose flour
- ⅓ cup granulated sugar
- 6 tablespoons cold butter, cut into small cubes
Pro Tips
- Use Room Temperature Ingredients Having your milk, eggs, and sour cream at room temp helps the batter come together more easily and bake more evenly. It’s a small step that makes a big difference.
- Don’t Overmix the Batter Once you add the wet ingredients to the dry, mix just until everything is combined. A few lumps are totally fine. Overmixing can lead to dense, tough muffins.
- Coat Your Blueberries in Flour Before folding them into the batter, toss the blueberries in a little bit of flour. This keeps them from sinking to the bottom while they bake.
- Fill the Muffin Cups to the Top If you want that classic tall muffin top, don’t be shy. Fill those liners right up to the top.
- Bake at a High Temperature First Starting at a high oven temp for the first few minutes, then lowering it, helps the muffins rise fast and create that beautiful dome.
Tools You’ll Need
- Muffin tin
- Paper liners
- Mixing bowls
- Measuring cups and spoons
- Whisk
- Rubber spatula
- Pastry cutter or fork (for the crumb topping)
Substitutions and Variations
- Cornmeal: You can skip it if you want a smoother texture. Just replace it with the same amount of flour.
- Sour Cream: Greek yogurt works perfectly here if that’s what you have on hand.
- Blueberries: Feel free to swap in raspberries, blackberries, or even chopped strawberries.
- Gluten-Free Option: Use a good 1:1 gluten-free flour blend.
- Dairy-Free Option: Swap in plant-based milk and dairy-free sour cream if needed.
Make-Ahead Tips
You can mix the dry ingredients and prepare the crumb topping the night before. Store them separately. In the morning, just mix up the wet ingredients, combine, and bake. Super easy if you want fresh muffins without the morning chaos.
Instructions
- Preheat your oven to 425°F and line your muffin tin with liners.
- Make the Crumb Topping In a small bowl, stir together the flour and sugar. Cut in the cold butter until it forms coarse crumbs. Set aside in the fridge while you make the batter.
- Mix the Dry Ingredients In a large bowl, whisk together the flour, cornmeal, baking powder, baking soda, cinnamon, and salt.
- Mix the Wet Ingredients In another bowl, whisk together the melted butter, oil, and sugar until smooth. Add the eggs and vanilla, then whisk again. Stir in the milk and sour cream.
- Combine Pour the wet ingredients into the dry ingredients and gently mix just until combined. Do not overmix.
- Fold in the Blueberries Toss your blueberries in a tablespoon of flour, then fold them into the batter gently.
- Fill the Muffin Cups Divide the batter evenly between the muffin liners, filling them all the way to the top. Sprinkle a generous amount of crumb topping over each muffin.
- Bake Bake for 5 minutes at 425°F, then lower the oven temperature to 350°F and bake for another 15 to 17 minutes. They’re done when a toothpick inserted into the center comes out clean or with a few moist crumbs.
- Cool Let the muffins cool in the tin for about 5 minutes before transferring them to a wire rack.
Nutrition Breakdown (Per Muffin)
- Calories: Around 320
- Fat: 15g
- Carbohydrates: 42g
- Protein: 5g
- Sugar: 20g
- Fiber: 1g
Just a rough estimate depending on what brands you use.
Leftovers and Storage Tips
- Room Temperature: Keep them in an airtight container for up to 3 days.
- Refrigerate: Store them in the fridge for up to a week. Warm them slightly before eating for that fresh-baked taste.
- Freeze: Wrap each muffin individually and freeze for up to 3 months. Let them thaw at room temperature or pop them in the microwave.
FAQs
Can I use frozen blueberries?
Absolutely. No need to thaw them. Just toss them in flour and add straight to the batter.
Why are my muffins dense?
It usually comes down to overmixing. Stir just until everything is combined and you’ll get soft, fluffy muffins.
How do I get my muffins to rise like bakery muffins?
Starting with a higher oven temp helps the tops puff up beautifully before lowering the temperature to finish baking.
Can I skip the crumb topping?
Definitely. These muffins are amazing on their own, but the crumb topping gives them a little extra bakery magic.
Wrapping Up
There’s just something so special about making your own bakery-style blueberry muffins at home. It feels like such a simple joy but creates such a huge moment of happiness.
Whether you’re making these for a cozy weekend breakfast, a snack for the kids, or just because you deserve a treat, I hope you love them as much as I do.
If you give this recipe a try, I’d love to hear how it went! Leave a comment below and let me know if you made any fun tweaks or have any questions.