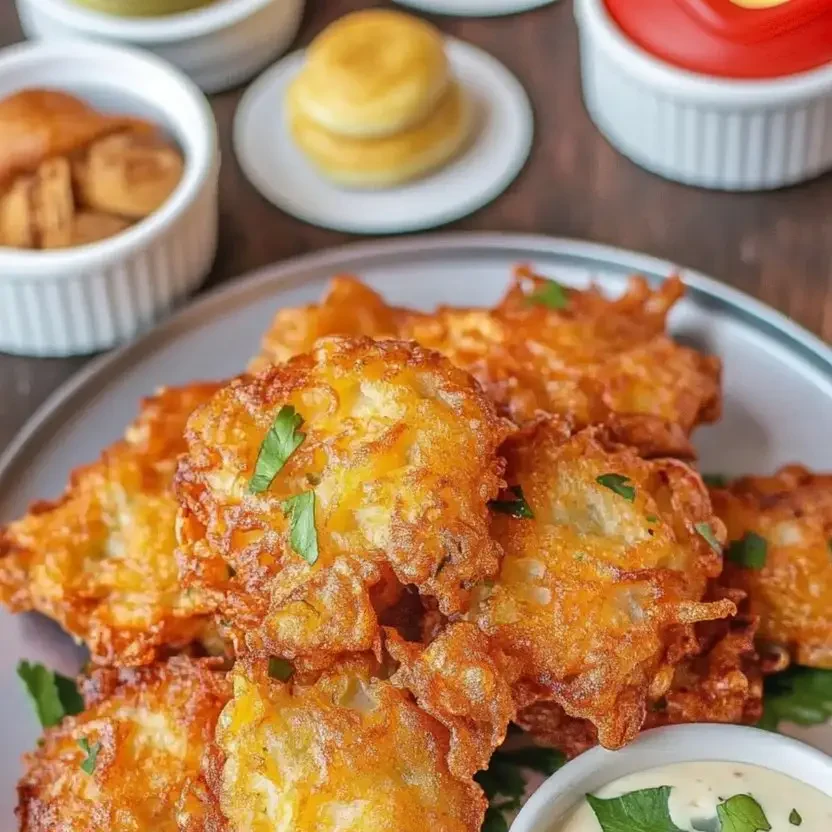
If you’ve ever had one of those moments where you’re hungry but not sure what to eat, then these Crispy Amish Onion Fritters will hit the spot!
Seriously, they’re the perfect balance of crispy and savory with just the right amount of sweetness from the onions. I first came across this recipe while visiting Amish country, and it quickly became a family favorite.
They’re super easy to make and go with pretty much anything, from a side dish at dinner to a snack when you’re just craving something delicious.
What You’ll Need
- 2 large sweet onions, thinly sliced
- 1 cup all-purpose flour
- 1 tablespoon granulated sugar
- 1 tablespoon cornmeal
- 2 teaspoons baking powder
- 1 teaspoon salt
- 1/2 teaspoon black pepper
- 1/4 teaspoon paprika (optional)
- 1 large egg
- 3/4 cup milk
- Vegetable oil (for frying)
Pro Tips
- Let the onions sit for a bit: After slicing, sprinkle a pinch of salt over the onions and let them sit for about 10 minutes. This helps draw out extra moisture and gives the fritters a better texture.
- Don’t overmix the batter: It’s easy to get carried away, but try to avoid overmixing. A few lumps in the batter is totally fine. This keeps the fritters light and crispy instead of dense.
- Watch your oil temperature: The oil should be around 365°F (185°C). If it’s too hot, your fritters will burn; if it’s not hot enough, they’ll absorb too much oil and get greasy. Use a thermometer to make sure you’re on track.
- Use a slotted spoon: A slotted spoon works wonders when you’re dropping the batter into the hot oil. It helps keep the fritters from sticking and makes it easier to flip them over.
- Drain them well: After frying, place the fritters on a paper towel-lined plate to drain any excess oil. It keeps them crispy and prevents them from getting soggy.
Tools You’ll Need
- Large mixing bowl
- Whisk
- Skillet or deep fryer
- Slotted spoon
- Paper towels
- Tongs (optional)
Substitutions and Variations
- Gluten-Free? No problem! Swap the all-purpose flour for a gluten-free flour blend, and make sure your cornmeal is gluten-free as well.
- Dairy-Free? You can use almond milk or oat milk in place of regular milk. Just make sure you’re using a good egg replacement if you’re going full-on dairy-free.
- Add a Kick: Want some spice? Try adding a pinch of cayenne pepper or finely chopped jalapeños to the batter for a little extra heat.
- Cheese Lover? Feel free to stir in 1/2 cup of shredded cheese (cheddar or Parmesan) into the batter for a cheesy twist.
Make-Ahead Tips
If you want to prep in advance, you can make the batter up to 2 hours ahead and store it in the fridge. This gives the flavors a chance to meld and also makes it easier to get dinner on the table when you’re short on time. Just give the batter a quick stir before frying.
Instructions
- Prep the onions: Slice the onions thinly and sprinkle them with a pinch of salt. Let them sit for about 10 minutes to draw out some of the moisture.
- Make the batter: In a separate bowl, whisk together the flour, sugar, cornmeal, baking powder, salt, pepper, and paprika. In another bowl, beat the egg and stir in the milk. Add the wet ingredients to the dry ingredients and stir until just combined. It’s okay if the batter is a little lumpy — you don’t want to overdo it.
- Add the onions: Gently fold the onions into the batter until they’re evenly coated.
- Heat the oil: Pour vegetable oil into a skillet, about 1/2 inch deep, and heat it over medium-high heat until it reaches 365°F (185°C). A thermometer is super helpful here!
- Fry the fritters: Drop spoonfuls of the batter into the hot oil. Don’t crowd the pan. Flatten them out slightly as they cook. Fry for about 3-4 minutes on each side, or until golden brown.
- Drain and serve: Once they’re golden and crispy, remove the fritters from the oil and place them on a paper towel-lined plate to drain off any excess oil. Serve hot!
Nutritional Breakdown (per serving)
- Calories: 120
- Carbohydrates: 20g
- Protein: 3g
- Fat: 1g
- Saturated Fat: 0.5g
- Cholesterol: 20mg
- Sodium: 300mg
- Potassium: 150mg
- Fiber: 1g
- Sugar: 6g
Meal Pairing Suggestions
- With a Main Course: These fritters are great alongside grilled chicken, a nice roast, or a hearty vegetable stew.
- Side Dish: Pair them with mashed potatoes, a simple salad, or roasted vegetables for a complete, comforting meal.
- As an Appetizer: Serve them with a variety of dips like ranch, ketchup, or a tangy BBQ sauce to start off any meal.
Leftovers and Storage
If you happen to have any fritters left over (although, let’s be real, they’re usually gone quickly!), store them in an airtight container at room temperature for up to 2 days. To reheat, just pop them in a 350°F (175°C) oven for 5-7 minutes to get that crispy texture back.
FAQs
Can I freeze these fritters?
Yes, absolutely! After frying, let them cool completely, then place them in a single layer on a baking sheet and freeze until solid. Once frozen, transfer them to a freezer-safe bag and store for up to 1 month. Reheat them in the oven when you’re ready to eat.
Can I use yellow onions instead of sweet onions?
Yes! Yellow onions work great too. They’ll have a stronger flavor than sweet onions, so if you prefer a more mellow taste, stick with sweet onions.
Can I bake these instead of frying them?
You can! While frying gives the best crispy results, you can bake them at 400°F (200°C) on a parchment-lined baking sheet for about 15-20 minutes, flipping them halfway through. They won’t be quite as crispy, but they’ll still be tasty.
Wrapping Up
These Crispy Amish Onion Fritters are such a simple, yet delicious way to bring a little extra flavor to any meal. Whether you’re feeding your family, or enjoying them as a snack, I know you’ll love them.
So, what are you waiting for? Give them a try, and when you do, leave a comment below and let me know how they turned out! I’d love to hear about your experience and any changes you made to the recipe.