Remember those long summer afternoons? The kind where the sun just wouldn’t quit, and the only relief was the sprinkler in the front yard or a dive into the neighborhood pool.
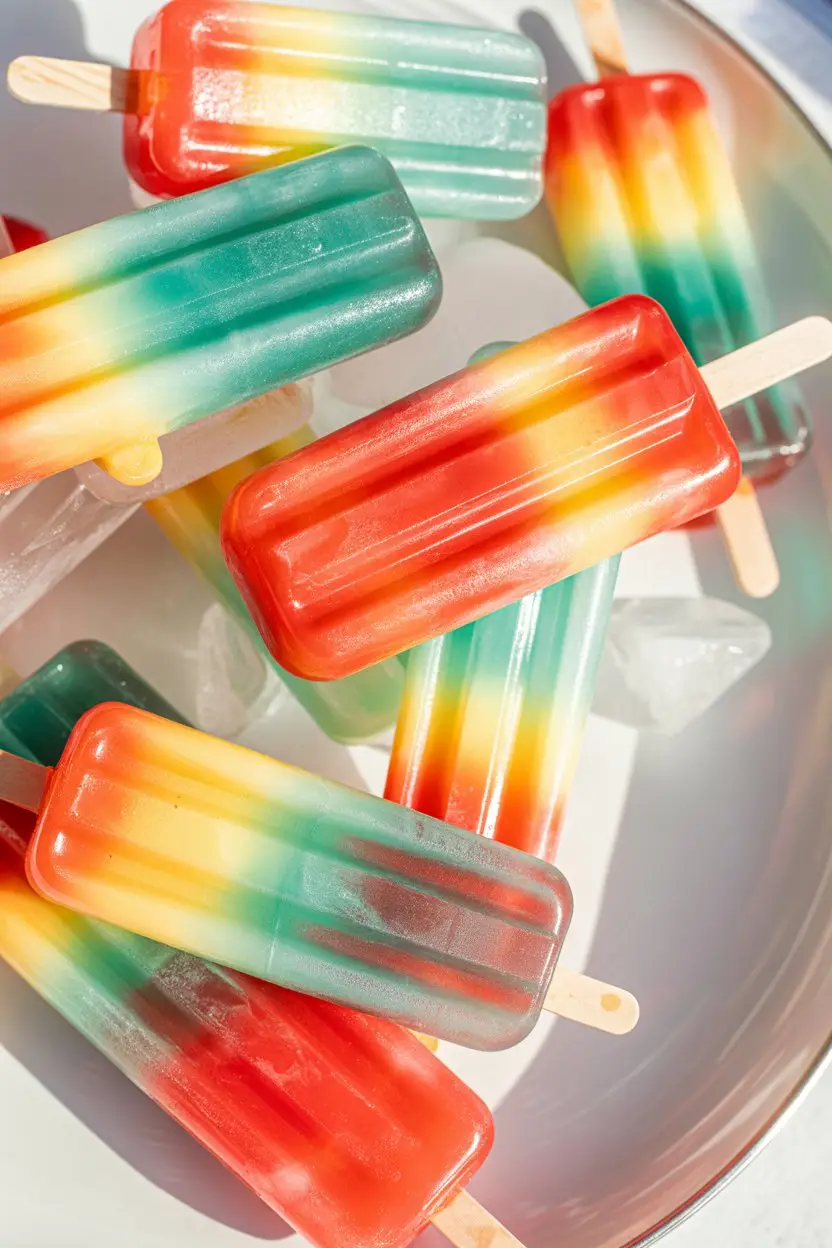
For me, the perfect end to a day like that was a brightly colored, ice-cold treat. Nothing fancy, just pure, simple joy on a stick. That’s exactly what these Jello popsicles are.
This isn’t some complicated gourmet recipe. It’s a throwback to simpler times, a recipe so easy you’ll wonder why you ever bought popsicles from the store. It’s about creating a little bit of magic with just a couple of ingredients.
So let’s bring back that little slice of childhood, shall we?
What You’ll Need
The beauty of this recipe is its simplicity. You probably have everything you need right in your pantry.
- 1 box (3 ounces) of your favorite flavor of Jello gelatin
- 1 cup of boiling water
- 1 cup of cold water
Tools Required
You don’t need any fancy gadgets for this one. Just a few kitchen basics will do the trick.
- Popsicle mold
- Popsicle sticks (if your mold doesn’t include them)
- A mixing bowl or a 4-cup measuring cup with a spout
- Whisk or spoon
- Kettle or pot to boil water
How to Make Jello Popsicles
This is where the fun begins. It’s a quick and straightforward process that’s perfect for making with kids.
Step 1: Start by boiling one cup of water. You want it fully boiling to properly dissolve the gelatin powder.
Step 2: While the water is heating, empty the Jello powder packet into your mixing bowl. Using a measuring cup with a spout makes pouring into the molds much easier later on.
Step 3: Carefully pour the one cup of boiling water into the bowl with the Jello powder. Whisk everything together for about two minutes. Make sure every last crystal is completely dissolved. Scrape the sides and bottom of the bowl to be sure.
Step 4: Once the gelatin is fully dissolved, stir in the one cup of cold water. This helps to cool down the mixture so it’s safe to pour.
Step 5: Gently pour the Jello mixture into your popsicle molds. Leave a little bit of space at the top, as the liquid will expand slightly when it freezes.
Step 6: If your mold has a lid that holds the sticks in place, put it on now. If not, freeze the pops for about 1-2 hours, or until they are slushy, then insert the popsicle sticks into the center of each one.
Step 7: Freeze for at least 4-6 hours, or preferably overnight, until they are completely solid. Patience is key here!
Pro Tips
I’ve made my fair share of these over the years. Here are a few tricks I’ve picked up to guarantee perfect pops every time.
- Banish the Bubbles: After you mix the Jello, you might see some foam or bubbles on top. Let the mixture sit for about five minutes before pouring. This allows the bubbles to settle, giving you a clearer, more jewel-toned popsicle.
- The Easy Release Trick: Don’t fight with your popsicle molds. To get a popsicle out without a struggle, run the outside of the mold under warm (not hot!) water for about 15-20 seconds. It will slide right out.
- Layering Like a Pro: For rainbow pops, you need patience. Pour your first color and let it set in the freezer for about 30-45 minutes until it’s firm but not frozen solid. Gently pour the next color on top and repeat. If you pour too soon, the colors will mix.
Substitutions and Variations
Want to mix things up? This recipe is incredibly versatile. Here are some fun ideas to get you started.
| Variation Idea | How to Do It |
|---|---|
| Fruity Pops | Add finely diced fruit like berries or mango into the molds before pouring the Jello. |
| Creamy Dream Pops | Replace the cold water with a cup of yogurt or coconut milk for a creamy texture. |
| Gummy Surprise | Drop a few gummy bears or worms into the molds for a fun surprise inside. |
| Juice Infused | Substitute some or all of the cold water with a complementary fruit juice, like white grape or apple juice. |
Make-Ahead Tips
These popsicles are the ultimate make-ahead treat. Since they need a good amount of time to freeze, they are perfect for preparing a day or two before you need them.
If you’re making a large batch for a party, you can demold them all at once and store them in a freezer-safe bag or container, separated by sheets of wax paper to prevent sticking. They’ll be ready to grab and go when your guests arrive.
Nutritional Breakdown and Diet Swaps
These are a light and refreshing dessert. Here’s a general idea of the nutrition, though it will vary based on the specific Jello brand you use.
| Nutrient | Estimated Amount (per pop) |
|---|---|
| Calories | ~20-30 kcal |
| Sugar | ~4-5 g |
| Carbohydrates | ~4-5 g |
| Protein | ~0.5 g |
For a Low-Carb or Keto-Friendly Option: Simply use a box of sugar-free Jello. The process is exactly the same, and you’ll have a delicious treat with virtually zero carbs and sugar.
For a Vegan Option: Standard Jello contains gelatin, which is an animal product. Look for vegan or plant-based jellying powders, often found in health food stores. The setting properties might be slightly different, so follow the package instructions.
When to Serve These Treats
While you don’t really need an excuse to enjoy a popsicle, they are the perfect light dessert after a summer meal. Think about serving them after a backyard BBQ with grilled chicken or burgers.
They are also a fantastic, low-effort treat for kids’ birthday parties or any outdoor gathering on a warm day.
Time-Saving Tips
This recipe is mostly hands-off, but you can streamline the process. Use an electric kettle to boil your water in just a couple of minutes.
Also, having a dedicated set of popsicle molds that you keep in an easy-to-reach spot means you can whip these up whenever the mood strikes without having to hunt for your tools.
Leftovers and Storage
If you somehow have leftovers, storing them correctly is important to keep them tasting fresh.
Once frozen solid, it’s best to remove the popsicles from their molds. This frees up your mold for the next batch! Place them in a single layer inside a freezer-safe zip-top bag or an airtight container.
For best results, place a sheet of wax paper or parchment paper between layers to prevent them from freezing together into one giant pop. They will keep well in the freezer for up to a month.
Frequently Asked Questions
Q1. How long do Jello popsicles take to freeze solid?
Ans: It generally takes about 4 to 6 hours for them to freeze completely. For the best, most solid texture, I recommend freezing them overnight.
Q2. Can I use less sugar or a sugar substitute?
Ans: Absolutely. The easiest way to do this is by using a sugar-free Jello mix. It works perfectly and creates a great low-calorie treat.
Q3. Why did my popsicles turn out icy instead of smooth?
Ans: This usually happens if the Jello powder wasn’t fully dissolved in the boiling water. Make sure you whisk for at least two full minutes until the liquid is perfectly clear before adding the cold water.
Q4. Can I add whole pieces of fruit?
Ans: You can, but it’s better to chop the fruit into small pieces. Large chunks can disrupt the freezing process and make the popsicles harder to eat. Small berries like raspberries or blueberries work great, as do finely diced peaches or strawberries.
Wrapping Up
There you have it. A recipe that’s more than just a recipe; it’s a portal back to those carefree summer days. It’s simple, fun, and almost impossible to get wrong.
Now it’s your turn. Go grab a box of your favorite Jello and give it a try. I promise, the first bite of that cold, jiggly pop will bring a smile to your face.
When you make them, come back and leave a comment below! Let me know what flavors you tried or if you discovered any fun new variations. I’d love to hear about your popsicle-making adventures.