We’ve all been there. You buy a beautiful bunch of bananas with the best intentions. You’re going to have one with breakfast, maybe slice one into your oatmeal. But then life happens.
You blink, and suddenly those once-perfect yellow bananas have become a sad, spotty, brown mess on your counter. The fruit flies are starting to get interested, and you feel a pang of guilt. Don’t throw them out!
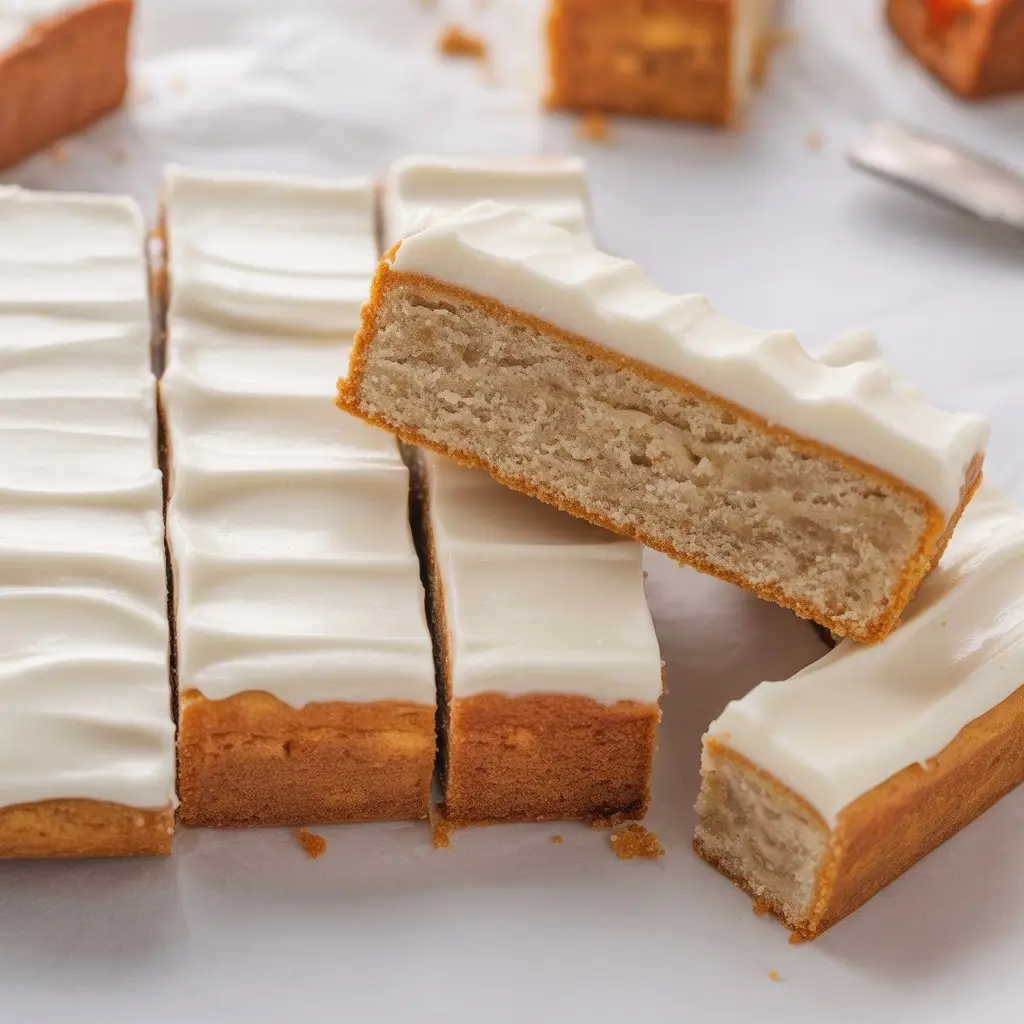
This is not a failure; it’s an opportunity. Those overripe bananas are flavor gold, just waiting to be transformed. Today, we’re turning that countertop tragedy into a triumph: incredibly moist, soft Banana Bread Bars, slathered in a tangy, luscious cream cheese frosting.
This recipe is my go-to for a reason. It’s less fussy than a traditional loaf, bakes faster, and let’s be honest—the frosting-to-bar ratio is a total game changer.
What You’ll Need
Here’s a quick rundown of the ingredients. I’ve split them up for the bars and that glorious frosting to keep things simple.
For the Banana Bars:
- 2 cups all-purpose flour
- 1 teaspoon baking soda
- 1/2 teaspoon salt
- 1/2 teaspoon ground cinnamon
- 1/2 cup unsalted butter, melted
- 1 cup granulated sugar
- 2 large eggs, at room temperature
- 1 teaspoon vanilla extract
- 3 large, very ripe bananas, mashed (about 1 1/2 cups)
For the Cream Cheese Frosting:
- 8 ounces block-style cream cheese, softened
- 1/4 cup unsalted butter, softened
- 2 cups powdered sugar, sifted
- 1 teaspoon vanilla extract
- A pinch of salt
Tools Required for the Job
You won’t need any highly specialized equipment for this recipe. Just your standard baking arsenal will do the trick.
- 9×13 inch baking pan
- Large mixing bowl
- Medium mixing bowl
- Whisk
- Spatula
- Electric mixer (handheld or stand mixer) for the frosting
- Measuring cups and spoons
- Toothpick or cake tester
Pro Tips for Perfect Bars
Over the years, I’ve made every mistake in the book so you don’t have to. Here are a few secrets to success.
- Embrace the Brown Banana: Seriously, the spottier and browner, the better. As bananas ripen, their starches convert to sugar, making them sweeter and more flavorful. This also makes them incredibly moist, which is key to a tender banana bar.
- The “Just Combined” Rule: When you mix the wet and dry ingredients, stop as soon as you no longer see streaks of flour. Overmixing develops gluten, which will make your bars tough and dense instead of soft and cakey. A few little lumps are perfectly fine!
- Room Temperature is Your Friend: For the frosting, this is non-negotiable. Softened cream cheese and butter whip together into a smooth, creamy dream. If they’re too cold, you’ll end up with a lumpy, frustrating mess. Take them out of the fridge an hour before you start.
- Cool It Completely: I know it’s tempting to frost the bars while they’re still warm. Don’t do it! A warm base will melt your beautiful frosting into a soupy puddle. Patience is a virtue here; let the bars cool completely to room temperature first.
Step-by-Step Instructions
Ready to get baking? Let’s walk through it step by step.
Step 1: Preheat your oven to 350°F (175°C). Grease and flour a 9×13 inch baking pan, or line it with parchment paper leaving an overhang on the sides to easily lift the bars out later.
Step 2: In a medium bowl, whisk together the flour, baking soda, salt, and cinnamon. Set this dry mixture aside for now.
Step 3: In a large bowl, combine the melted butter and granulated sugar. Whisk them together until well combined. Add the room temperature eggs and vanilla extract, mixing until everything is incorporated.
Step 4: Mash your super-ripe bananas in a separate small bowl with a fork, then add them to the wet ingredient mixture. Stir until just combined.
Step 5: Gently fold the dry ingredients into the wet ingredients. Mix with a spatula only until you no longer see dry flour. Remember, don’t overmix!
Step 6: Pour the batter into your prepared pan and spread it evenly with the spatula. Bake for 25-30 minutes, or until a toothpick inserted into the center comes out clean or with a few moist crumbs attached.
Step 7: Let the banana bars cool completely in the pan on a wire rack. This might take an hour or two, but it’s a crucial step.
Step 8: While the bars cool, make the frosting. In a large bowl using an electric mixer, beat the softened cream cheese and softened butter together until smooth and creamy, about 2 minutes.
Step 9: Gradually add the sifted powdered sugar, mixing on low speed at first to avoid a sugar cloud. Once it’s incorporated, add the vanilla and pinch of salt, then increase the speed to medium-high and beat for another 2-3 minutes until the frosting is light and fluffy.
Step 10: Once the bars are completely cool, spread the cream cheese frosting evenly over the top. Slice into bars and serve.
Substitutions and Variations
This recipe is a great base for getting creative. Here are a few tried-and-true swaps and additions.
| Category | Idea | Notes |
|---|---|---|
| Flour | 1:1 Gluten-Free Flour | Use a blend with xanthan gum. |
| Add-Ins | Chocolate Chips | Add 1 cup to the batter. |
| Add-Ins | Chopped Walnuts | Add 3/4 cup for a nice crunch. |
| Sugar | Brown Sugar | Use in place of white sugar for more moisture. |
Nutritional Info & Meal Pairings
While these are definitely a treat, it’s good to have an idea of what you’re enjoying. The info below is an approximation per bar.
| Nutrient | Approximate Amount per Bar |
|---|---|
| Calories | 250-300 kcal |
| Fat | 12g |
| Carbohydrates | 35g |
| Protein | 3g |
Dietary Swaps: To make these dairy-free, use a plant-based butter substitute and dairy-free cream cheese for the frosting. Use coconut oil in the bars instead of butter.
Pairing Suggestions: These bars are a perfect companion to a hot cup of coffee or a cold glass of milk. They also make a fantastic dessert after a simple dinner like a hearty soup or salad.
Make-Ahead & Storage Tips
Planning is everything. You can absolutely make these ahead of time.
Make-Ahead: You can bake the banana bars, let them cool, and store them tightly covered at room temperature for up to 24 hours before frosting and serving. The frosting can also be made ahead and stored in an airtight container in the refrigerator for up to 3 days. Just let it soften a bit and give it a quick whip before using.
Leftovers and Storage: Because of the cream cheese frosting, any leftover bars must be stored in the refrigerator. Place them in an airtight container, and they’ll stay fresh and delicious for up to 4-5 days. They taste great straight from the fridge!
Frequently Asked Questions
Q1. My bananas aren’t ripe enough. Is there a quick way to ripen them?
Ans: Yes! Place the unpeeled bananas on a baking sheet and bake them at 300°F (150°C) for 15-20 minutes, or until the peels are completely black and shiny. Let them cool, then scoop out the soft, sweet pulp. It works like a charm.
Q2. Why is my cream cheese frosting runny?
Ans: This usually happens for two reasons. Either the cream cheese or butter was too soft (almost melty), or you used cream cheese from a tub instead of the block style. Tub-style cream cheese has more water and a whipped texture that doesn’t work well for frosting. If it’s a little runny, try chilling it in the fridge for 30 minutes to help it firm up.
Q3. Can I use frozen bananas?
Ans: Absolutely. Thaw them completely at room temperature or in the microwave. They will release a lot of liquid when they thaw—be sure to include that liquid in the batter! It’s full of banana flavor.
Q4. Can I bake this recipe in a different pan?
Ans: You can. An 8×8 or 9×9 inch square pan will work, but the bars will be much thicker and will require a longer baking time. Start checking for doneness around the 35-minute mark and adjust as needed.
Wrapping Up
There you have it—a simple, foolproof way to turn those neglected bananas into a crowd-pleasing dessert. These Banana Bread Bars are moist, packed with flavor, and that cream cheese frosting takes them to a whole new level.
They’re perfect for potlucks, bake sales, or just a Tuesday afternoon when you need a little something sweet. I truly hope you give this recipe a try.
If you do, please come back and leave a comment below! I’d love to hear how they turned out for you or if you discovered any fun variations.