I remember those hot summer days when the sound of an ice cream truck was the most exciting thing in the world. I’d grab my change and run out, always for the same thing: a strawberry-something-or-other.
But as I got older, I realized that neon pink cone didn’t really taste like strawberries. It tasted like… well, pink. Sweet, artificial, and ultimately a little disappointing.
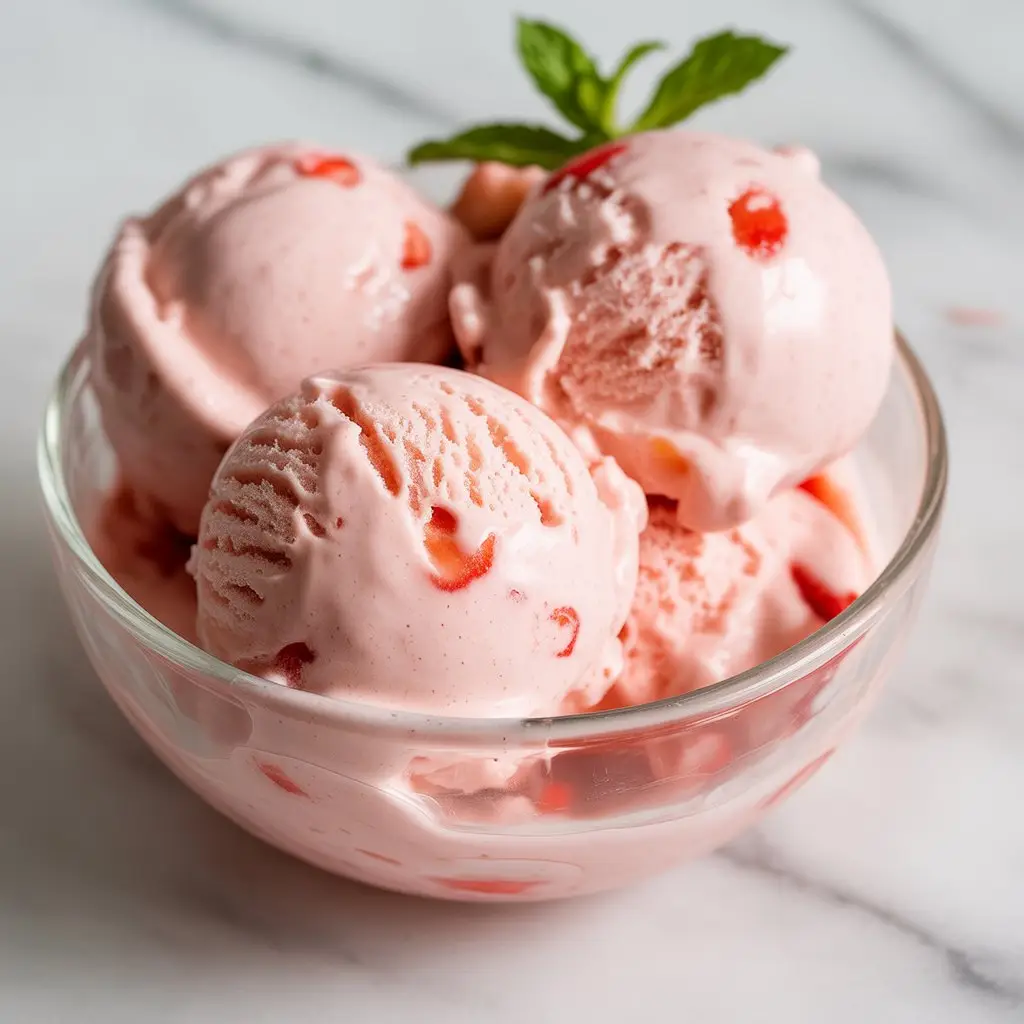
That’s what sent me on a mission to create a homemade strawberry ice cream that captures the true, bright, and juicy flavor of a perfectly ripe strawberry. This isn’t just pink-colored vanilla ice cream. This is the real deal.
This recipe uses a simple technique to pull all the flavor from the fruit, creating a creamy, dreamy, and intensely strawberry-flavored ice cream. Let’s make something you’ll be proud to scoop.
What You’ll Need
The beauty of this recipe is its simplicity. You don’t need a long list of strange ingredients. It’s all about quality.
- Fresh Strawberries: You’ll need about a pound. The riper and more fragrant they are, the better your ice cream will be. This is where the flavor comes from!
- Granulated Sugar: This sweetens the ice cream and also helps keep the texture smooth and less icy.
- Heavy Cream: This is non-negotiable for a rich, creamy texture. You need the high fat content for a luscious mouthfeel.
- Whole Milk: We use this along with the cream to create the perfect custard base. Please don’t use skim milk; it will result in an icy texture.
- Egg Yolks: These are the secret to a rich, custardy base that’s super smooth and scoopable. They act as a natural emulsifier.
- Lemon Juice: Just a tiny squeeze. It won’t make the ice cream taste like lemon, but it will make the strawberry flavor pop.
- Vanilla Extract: A small amount complements the strawberry flavor beautifully.
| Prep Time | 25 minutes |
| Cook Time | 15 minutes |
| Chill & Churn Time | Minimum 5 hours |
| Total Time | About 5 hours 40 minutes |
Tools You’ll Need
Having the right tools makes the process go smoothly. Here’s what I recommend you gather before you start.
- Ice Cream Maker
- Medium Saucepan
- Mixing Bowls
- Whisk
- Fine-Mesh Sieve or Strainer
- Spatula
- Airtight, Freezer-Safe Container
- Blender or Food Processor (optional, for a smoother texture)
Pro Tips for Perfect Ice Cream
I’ve made my share of mistakes so you don’t have to. Here are a few things I’ve learned that make a huge difference.
- Don’t Skip the Chill Time. I can’t stress this enough. The custard base needs to be completely, utterly cold before it goes into the ice cream maker. I’m talking at least 4 hours in the fridge, but overnight is even better. A warm base will not churn properly, resulting in a soupy, icy mess.
- Macerate Your Berries. Macerating is just a fancy word for letting the strawberries sit in sugar. This draws out their natural juices and concentrates their flavor, creating a beautiful syrup that infuses the entire batch with pure strawberry goodness.
- Strain for Ultimate Smoothness. For a silky smooth, professional-style ice cream, strain the custard base through a fine-mesh sieve. This removes any little bits of cooked egg that might have formed. I also recommend straining the strawberry puree to remove most of the seeds for a better mouthfeel.
- A Splash of Booze (Optional!). Adding one tablespoon of a neutral spirit like vodka to your custard base before churning is a pro-secret. Alcohol doesn’t freeze solid, which helps keep your homemade ice cream from turning into a rock-hard brick in the freezer. It will be much easier to scoop.
Step-by-Step Instructions
Let’s break this down into simple, manageable steps. Follow along, and you’ll have amazing ice cream in no time.
Step 1: Prepare the Strawberries
Wash, hull, and slice your strawberries. In a medium bowl, combine the sliced strawberries with 1/2 cup of the granulated sugar and the lemon juice. Stir gently to coat, then let them sit at room temperature for at least one hour. The berries will release their juices and become wonderfully syrupy.
Step 2: Make the Custard Base
In a separate bowl, whisk the egg yolks until they are pale and slightly fluffy. In a medium saucepan, combine the heavy cream, whole milk, and the remaining sugar. Warm this mixture over medium heat, stirring occasionally, until the sugar has dissolved and the mixture is hot to the touch (but not boiling!).
Step 3: Temper the Eggs
This is a crucial step to prevent scrambled eggs. Slowly pour about one cup of the hot milk mixture into the whisked egg yolks, whisking constantly. This gently raises the temperature of the eggs. Now, pour the tempered egg mixture back into the saucepan with the rest of the milk.
Step 4: Cook the Custard
Return the saucepan to medium-low heat. Cook, stirring constantly with a spatula, scraping the bottom and sides of the pot. The custard is done when it’s thick enough to coat the back of the spatula. If you draw a line through it with your finger, the line should hold. This usually takes 5-8 minutes. Do not let it boil!
Step 5: Chill the Base
Immediately pour the finished custard through a fine-mesh sieve into a clean bowl. This catches any bits of cooked egg. Stir in the vanilla extract. Cover with plastic wrap, pressing it directly onto the surface of the custard to prevent a skin from forming. Refrigerate for at least 4 hours, or preferably overnight.
Step 6: Finish the Strawberry Mixture
While the base is chilling, take your macerated strawberries and mash them with a fork or pulse them a few times in a blender. You can leave it chunky or make it smoother, depending on your preference. I like a mix of puree and small berry pieces. Chill this mixture as well.
Step 7: Churn Your Ice Cream
Once both the custard base and the strawberry mixture are fully chilled, it’s time to churn. Whisk the strawberry mixture into the cold custard base until combined. Pour this into your ice cream maker and churn according to the manufacturer’s instructions. It will look like a thick, soft-serve ice cream when it’s done, usually about 20-25 minutes.
Step 8: Freeze to Harden
Transfer the churned ice cream to a freezer-safe container. For a clean look, spread it evenly. For extra texture, you can fold in a few more finely diced fresh strawberries at this stage. Press a piece of parchment paper or plastic wrap directly onto the surface of the ice cream. This prevents ice crystals from forming. Freeze for at least 2-3 hours to “ripen” and firm up to a scoopable consistency.
Nutritional Information & Dietary Swaps
Homemade is always a little healthier because you control the ingredients. Here’s a rough idea of the nutrition and how to adapt it for different needs.
| Calories | 250-300 kcal |
| Fat | 18g |
| Carbohydrates | 20g |
| Protein | 4g |
Ingredient Swaps for Various Diets
- Dairy-Free / Vegan: This is achievable! Use one can of full-fat coconut cream and supplement with a high-quality, creamy plant-based milk like oat or cashew milk to replace the dairy. The results will be slightly different in texture but still delicious. You will also need to use a vegan egg yolk replacer or simply omit the eggs, though the texture will be less custardy.
- Lower Sugar / Keto: You can replace the granulated sugar with a powdered monk fruit/erythritol blend. Use a 1:1 ratio, but taste the base before chilling as you may need less. Sugar substitutes can make ice cream freeze harder, so the vodka trick mentioned in the pro-tips is highly recommended here.
Substitutions and Variations
Once you master the base recipe, you can get creative!
- Roasted Strawberry: Instead of macerating, roast your strawberries with a bit of sugar at 400°F (200°C) for 15-20 minutes until jammy. This deepens the flavor intensely. Let them cool completely before mixing into the base.
- Strawberry Cheesecake: After churning, gently fold in 4 ounces of softened cream cheese (cut into tiny cubes) and some crushed graham crackers before the final freeze.
- Balsamic Strawberry: Add one tablespoon of high-quality balsamic vinegar to the strawberries while they macerate. It sounds strange, but the tangy vinegar enhances the sweetness of the berries in a surprising way.
- No-Churn Version: No ice cream maker? No problem. Whip 2 cups of very cold heavy cream to stiff peaks. In a separate bowl, whisk your chilled strawberry puree with one 14-ounce can of sweetened condensed milk (omit the custard base steps). Gently fold the whipped cream into the strawberry mixture. Freeze in a loaf pan for at least 6 hours. The texture will be different, more like a semifreddo, but still amazing.
Tips for Efficiency and Meal Pairing
Making ice cream doesn’t have to take over your whole day.
Time-Saving Tip: The best way to make this feel effortless is to split the work. Make the custard base and macerate the strawberries the day before. The next day, all you have to do is combine them and churn, which takes less than 30 minutes of active time.
Serving Suggestions: This ice cream is a star on its own. But for a show-stopping dessert, try serving a scoop over warm brownies, a slice of angel food cake, or classic shortcakes with more fresh berries.
Leftovers and Storage
If you have any left (which is a big “if”), proper storage is key.
Store your ice cream in a shallow, airtight container in the coldest part of your freezer (usually the back). Always press a piece of plastic wrap or parchment paper directly on the surface of the ice cream before putting the lid on. This simple step is the best defense against icy freezer burn.
Your homemade strawberry ice cream is best enjoyed within 1-2 weeks. After that, it’s still safe to eat, but the texture may start to develop more ice crystals.
Frequently Asked Questions
Q1. Why is my ice cream icy instead of creamy?
Ans: This is the most common issue! It usually happens for one of three reasons: the custard base wasn’t cold enough before churning, you used low-fat milk or cream, or it wasn’t churned long enough. Ensure your base is chilled overnight for best results and always use full-fat dairy.
Q2. Can I use frozen strawberries?
Ans: Yes, you can. Thaw them completely first and drain any excess water before macerating them with sugar. The flavor might be slightly less vibrant than with fresh, in-season berries, but it will still work well.
Q3. My ice cream is rock-solid and hard to scoop. What went wrong?
Ans: This is common with homemade ice cream because home freezers are much colder than commercial ones. First, try letting the container sit on the counter for 5-10 minutes before scooping. In the future, adding a tablespoon of vodka or light corn syrup to the base before churning will help keep it more scoopable.
Q4. Do I really have to use egg yolks?
Ans: For a true, rich, Philadelphia-style custard ice cream, yes. The yolks add fat, richness, and act as an emulsifier for an ultra-creamy texture. You can find egg-free recipes (often called “Philadelphia style”), but they won’t have the same custardy flavor and will be more prone to iciness.
Wrapping Up
There you have it. A roadmap to creating a strawberry ice cream that is bursting with authentic, fresh flavor. It’s a little project, for sure, but the payoff is immense. That first spoonful of creamy, intensely fruity ice cream that you made yourself is a truly special moment.
So give it a try! I promise it’s worth the effort. When you do, come back and leave a comment below. I’d love to hear how it turned out, or if you discovered any fun variations of your own!