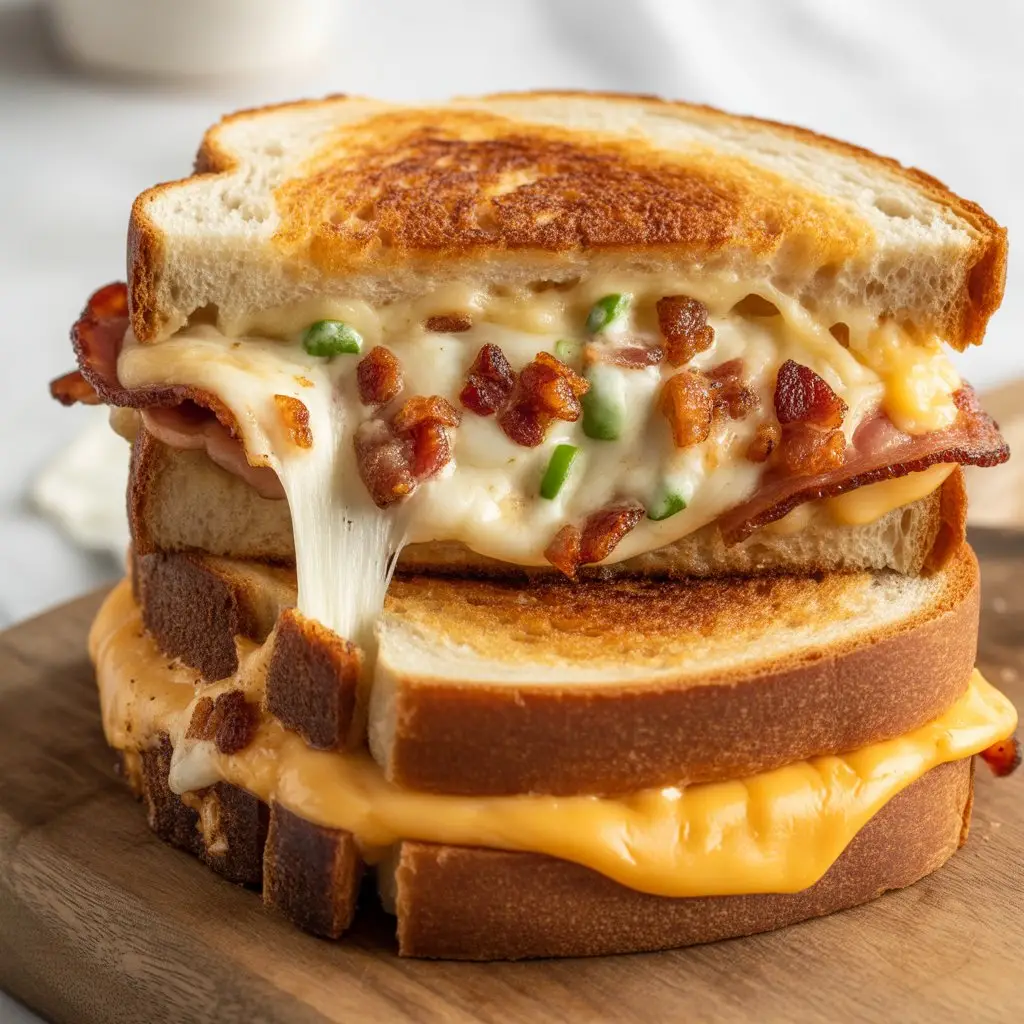
Jalapeno Bacon Grilled Cheese
Let’s be honest, a simple grilled cheese is a thing of beauty. It’s the first thing many of us learned to cook, a comfort food champion that never lets us down.
But sometimes, you need more. You need a sandwich that wakes up your taste buds and reminds you that comfort food can also have a wild side.
That’s where this Jalapeno Bacon Grilled Cheese comes in. It’s everything you love about the classic, but with a smoky, spicy, and outrageously cheesy upgrade.
It’s the kind of sandwich you make on a Friday night to celebrate the end of the week, or on a lazy Sunday when you deserve something truly special. This isn’t just a sandwich; it’s an experience.
What You’ll Need
The ingredients here are simple, but they come together to create something magical. Quality matters, so use bread and cheese you really love.
- Bread: 2 thick slices of sourdough or a sturdy white bread
- Bacon: 3-4 slices of thick-cut bacon
- Jalapeno: 1 fresh jalapeno, thinly sliced
- Cheese: 1/2 cup shredded sharp cheddar and 1/2 cup shredded Monterey Jack
- Butter/Mayo: 2 tablespoons of softened butter or mayonnaise
- Cream Cheese: 1 tablespoon of softened cream cheese (optional, but amazing)
Pro Tips
I’ve made my fair share of grilled cheese sandwiches, and I’ve learned a few things. These tips will take your sandwich from good to unforgettable.
- Low and Slow is the Way to Go. The biggest mistake is cranking up the heat. You’ll scorch the bread before that glorious cheese has a chance to melt. A medium-low heat is your best friend for a golden crust and gooey center.
- Mayo on the Outside. This might sound strange, but trust me. Spreading a thin layer of mayonnaise on the outside of the bread instead of butter results in a perfectly crisp, beautifully golden-brown crust. The oils in mayo have a higher smoke point.
- Pre-Cook Your Fillings. Don’t throw raw bacon and jalapenos in the sandwich. Cook the bacon until it’s perfectly crisp and give the jalapenos a quick sauté in a little bacon grease to soften them. This ensures every component is cooked perfectly.
- Shred Your Own Cheese. Those bags of pre-shredded cheese are convenient, but they contain starches to prevent clumping. These same starches prevent the cheese from melting into that smooth, creamy river of goodness you’re looking for. A block of cheese and a grater is the way.
Required Tools
You don’t need a professional kitchen for this. Just a few basics will do the job.
- Skillet or Frying Pan (cast iron is fantastic)
- Spatula
- Cutting Board
- Knife
- Cheese Grater (if following the pro tip!)
Substitutions and Variations
This recipe is a great starting point. Feel free to experiment and make it your own based on what you have or what you’re craving.
| Ingredient | Substitution Idea | Notes |
|---|---|---|
| Sourdough Bread | Brioche, Texas Toast, Rye | Brioche adds sweetness. |
| Cheddar/Jack Cheese | Gruyere, Provolone, Pepper Jack | Pepper Jack will add more spice. |
| Fresh Jalapeno | Pickled Jalapenos, Habanero | Pickled adds tang, habanero adds serious heat. |
| Bacon | Prosciutto, Canadian Bacon | Prosciutto gets crispy fast. |
Want to get even more creative? Try adding a thin layer of raspberry jam for a sweet and spicy combo, or some caramelized onions for a deep, rich flavor.
Make Ahead Tips
You can definitely do some prep work to make assembly even faster when the craving strikes.
- Cook the bacon ahead of time and store it in an airtight container in the fridge.
- Slice your jalapenos and keep them in a small container.
- Shred your cheese and store it in a zip-top bag.
With these components ready, you can assemble and cook your sandwich in just a few minutes.
How to Make Jalapeno Bacon Grilled Cheese
Alright, let’s get to the main event. Follow these steps for sandwich perfection.
Step 1: Place your bacon slices in a cold skillet and turn the heat to medium. Cook, flipping occasionally, until crisp. Remove the bacon to a paper towel-lined plate, leaving a little grease in the pan.
Step 2: Add the sliced jalapenos to the same skillet and cook for 1-2 minutes, just until they soften slightly and become bright green. Remove them from the pan.
Step 3: Lay out your two slices of bread. Spread your softened butter or mayonnaise on one side of each slice. This will be the outside of your sandwich.
Step 4: Flip the bread slices over. On the un-buttered side of one slice, spread the optional cream cheese. Then, layer on half of your shredded cheese blend.
Step 5: Crumble the cooked bacon over the cheese, then evenly distribute the sautéed jalapenos on top.
Step 6: Top with the remaining shredded cheese and place the second slice of bread on top, with the buttered/mayo side facing up.
Step 7: Carefully place the assembled sandwich into your skillet over medium-low heat. Cook for 3-5 minutes, until the bottom is golden brown and crispy.
Step 8: Flip the sandwich gently with a spatula and cook the other side for another 3-5 minutes, until it’s also golden brown and the cheese is completely melted and gooey.
Step 9: Remove from the skillet, let it rest for a minute (this is the hardest part!), then slice in half and serve immediately.
Serving and Nutrition Guide
This sandwich is a meal in itself, but it loves company. Here are some ideas for pairing, dietary swaps, and a peek at the nutrition.
| Pairing & Diet Info | |
|---|---|
| Perfect Pairings | A classic creamy tomato soup, a simple green salad with a vinaigrette, or a side of crispy fries. |
| Gluten-Free | Use your favorite sturdy gluten-free bread. |
| Vegetarian | Omit the bacon or use a plant-based bacon alternative. |
| Keto-Friendly | Use a keto-certified bread and ensure your bacon is sugar-free. |
For nutritional info, it can vary widely based on your ingredients. As a rough estimate, you can expect this sandwich to be a delicious indulgence.
| Nutrient (Estimate) | Amount |
|---|---|
| Calories | ~650-800 kcal |
| Protein | ~30g |
| Fat | ~45g |
| Carbohydrates | ~40g |
*Nutritional information is an estimate and not a substitute for professional medical advice.
Leftovers and Storage
Let’s be real, leftovers are unlikely. But if you happen to have some, grilled cheese is always best enjoyed fresh.
If you must store it, let the sandwich cool completely. Wrap it tightly in aluminum foil and store it in the fridge for up to two days.
To reheat, avoid the microwave at all costs—it will make the bread soggy. The best method is to place it back in a dry skillet over low heat until warmed through and re-crisped. An air fryer or toaster oven also works wonders.
Frequently Asked Questions
Q1. Can I use pickled jalapenos instead of fresh?
Ans: Absolutely! Pickled jalapenos work great. They will give the sandwich a slightly more tangy and vinegary bite, which is also delicious. Just be sure to pat them dry before adding them to the sandwich.
Q2. My bread is burning but the cheese isn’t melted. What did I do wrong?
Ans: Your heat is too high. This is the most common grilled cheese problem. Turn the stove down to medium-low. Patience is key to achieving a perfectly golden exterior and a melted, gooey interior.
Q3. Can I make this in an air fryer?
Ans: Yes! An air fryer is great for grilled cheese. Assemble the sandwich as directed and cook at around 370°F (185°C) for 4-5 minutes per side, or until golden and melted. You might want to secure the top slice of bread with a toothpick until the cheese starts to melt.
Q4. How can I make it less spicy?
Ans: To control the heat, make sure you remove all the seeds and white membranes from the inside of the jalapeno, as that’s where most of the capsaicin (the spicy stuff) lives. Sautéing them also mellows the flavor a bit. For even less heat, you could use a milder pepper like an Anaheim.
Wrapping Up
This Jalapeno Bacon Grilled Cheese is more than just a recipe; it’s a declaration that you’re serious about your comfort food. It’s cheesy, spicy, smoky, and satisfying in every single bite.
So go ahead, grab your ingredients and give it a try. I promise you won’t regret it. It’s the perfect way to treat yourself.
I would love to hear how your sandwich turned out! Did you make any changes or add your own twist? Leave a comment below and let me know.