
Peanut Butter Butterfinger Cookies

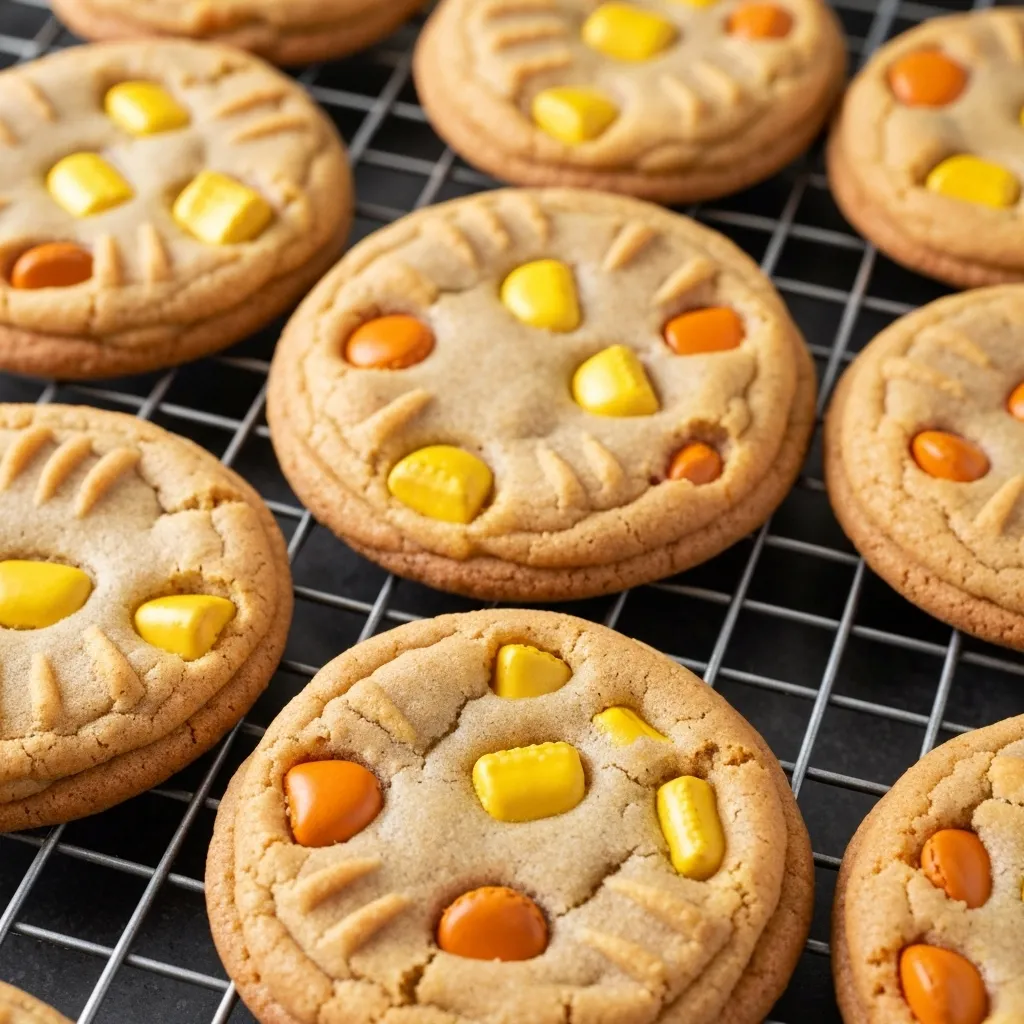
I spotted those bright yellow Butterfinger wrappers in the candy aisle and immediately knew I had to bake: peanut butter + crunchy candy bars = cookies worth making. These soft, chewy peanut butter cookies are studded with chopped Butterfinger candy for a sweet-and-salty bite that’s impossible to resist.
Quick overview: makes about 24 cookies; active time ~15 minutes, bake time 10–12 minutes (plus optional 30-minute chill). Get ready — your kitchen will smell amazing, and these butterfinger cookies are perfect for sharing or keeping all to yourself.
What You’ll Need
This recipe uses simple pantry staples — plus chopped Butterfinger candy for the crunchy, sweet pieces. (Allergy note: contains peanuts; see substitutions below.)
- 1 cup all-purpose flour (about 120 g)
- ½ teaspoon baking soda
- ¼ teaspoon salt
- ½ cup unsalted butter, softened (1 stick / 113 g)
- ½ cup creamy peanut butter (120 g) — use Jif or Skippy for best texture
- ½ cup packed brown sugar (100 g)
- ¼ cup granulated sugar (50 g)
- 1 large egg
- 1 teaspoon vanilla extract
- 1 cup chopped Butterfinger candy bars (about 5–6 fun-size bars; roughly 3.5–4 oz / 100–115 g)
Tools of the Trade
You don’t need any fancy equipment — just a few basic tools to make these peanut butter Butterfinger cookies turn out great.
- Mixing bowls (one small for dry ingredients, one larger for wet)
- Whisk (for dry ingredients)
- Electric mixer or stand mixer — a hand mixer on medium speed makes creaming the butter and sugars easiest; you can use a wooden spoon if needed but mix until light and fluffy
- Baking sheets (half-sheet pans work well)
- Parchment paper or a silicone baking mat to line the baking sheet and prevent sticking
- Cookie scoop or spoon (for uniform cookies)
- Cooling rack (move cookies here after 5 minutes on the sheet)
How to Make Peanut Butter Butterfinger Cookies
Follow these clear steps for reliably soft, chewy cookies studded with crunchy Butterfinger pieces. Yield: about 24 cookies. Prep time: ~15 minutes (plus optional 30-minute chill). Bake time: 10–12 minutes at oven 350°F (175°C).
Step 1: Preheat your oven to 350°F (175°C) and position a rack in the center. Line two baking sheets with parchment paper so the cookies don’t stick, or use a silicone mat. If baking on multiple sheets, rotate them halfway through baking to avoid hot spots.
Step 2: In a small bowl, whisk together 1 cup all-purpose flour, ½ teaspoon baking soda, and ¼ teaspoon salt. Set the dry mix aside.
Step 3: In a larger bowl, use an electric mixer or stand mixer on medium speed to cream ½ cup softened unsalted butter and both sugars (½ cup packed brown sugar + ¼ cup granulated sugar) until the mixture is light and fluffy, about 2–3 minutes. Stop when the color lightens and the texture looks aerated.
Step 4: Add the peanut butter, the large egg, and 1 teaspoon vanilla extract to the butter-sugar mixture. Beat on low-to-medium until fully combined — scrape the bowl once to make sure there are no streaks.
Step 5: Gradually add the dry flour mixture to the wet ingredients, mixing on low speed just until you no longer see streaks of flour. Do not overmix — stop as soon as the dough comes together to keep cookies tender.
Step 6: Gently fold in 1 cup chopped Butterfinger candy bars (roughly 1/4-inch pieces) using a spatula. Avoid the mixer here so the candy stays in chunks and doesn’t turn to dust.
Step 7: Use a cookie scoop or rounded tablespoon to drop dough onto your prepared baking sheets, spacing them about 2 inches apart. A #40 scoop (about 1 tablespoon) makes cookies that bake in the suggested time and yields ~24 cookies.
Step 8: Bake at oven 350°F for 10–12 minutes. The edges should be set and just turning golden; centers will still look slightly soft — they finish cooking from residual heat. If you prefer firmer cookies, add 1–2 minutes.
Step 9: Let the cookies rest on the baking sheet for 5 minutes, then transfer them to a cooling rack to finish cooling. This helps the cookies set up without over-baking the centers.
Tip: If your dough seems too soft to portion, chill it for 30 minutes before scooping. For frozen dough balls, bake from frozen and add 1–2 minutes to the bake time.
Pro Tips
After many batches, I’ve picked up a few reliable tricks that make a big difference. These quick tips help your dough behave and keep those Butterfinger pieces intact.
- Don’t Overmix: Once you add the flour, mix only until it’s just combined. Overmixing develops gluten and makes cookies chewy in an unpleasant way — stop as soon as the dough comes together.
- Chill the Dough: If the dough feels soft or warm, chill it for 30 minutes (or up to 2 hours). Chilling firms the dough, reduces spreading, and deepens flavor. If you’re short on time, straight-from-fridge dough bakes up thicker and chewier.
- Use Creamy Peanut Butter: Standard creamy peanut butter (Jif, Skippy) provides consistent texture. Natural peanut butter can separate and make the dough oily; crunchy peanut butter is fine if you want extra texture.
- Chop Candy by Hand: Hand-chop Butterfinger candy bars into rough 1/4-inch pieces so you get crunchy bits in every bite. A food processor will pulverize the candy into dust — you want chunks, not crumbs.
Substitutions and Variations
This base is forgiving — swap a few items to change the flavor or meet dietary needs. Here are tested options and what to expect.
| Butterfinger | Reese’s Cups, Heath bars, or chocolate chips | Reese’s adds more peanut-chocolate flavor; Heath gives a toffee crunch; chocolate chips keep it simple and melty — all change texture and sweetness. |
| Creamy Peanut Butter | Crunchy peanut butter or almond butter | Crunchy adds nutty texture; almond butter gives a different nut flavor and slightly drier dough (adjust with a splash of milk if needed). |
| All-Purpose Flour | Gluten-free 1-to-1 baking flour | Makes the recipe gluten-free; texture may be slightly different depending on the blend. |
Extra ideas: for a butter-focused twist, increase butter by 1–2 tablespoons and chill the dough a bit longer for a richer butter cookie. To make these butter butterfinger cookies, fold in a few chocolate chunks for contrast. If using butterfinger candy bars, roughly chop them into pieces so the bars hold up during baking.
Equipment note: a stand mixer makes creaming effortless, but a hand mixer on medium works well too — just watch the texture and stop once light and fluffy.
Timing note: many of these tweaks add only a few minutes of prep or an optional 30 minutes of chill time — well worth it for better texture and chunkier chopped Butterfinger pieces.
Make-Ahead and Storage
These cookies are perfect for making ahead — the dough and baked cookies both freeze well, which makes them a great make-ahead treat for parties or gift bags.
Make-Ahead Dough
You can prepare the cookie dough and store it in the refrigerator for up to 3 days. For longer storage, roll the dough into balls, place them on a baking sheet lined with parchment, freeze until solid (about 1–2 hours), then transfer the frozen dough balls to a freezer-safe bag or container — they keep well for up to 3 months. When ready to bake, you can bake from frozen; add 1–2 minutes to the bake time.
Leftovers and Storage
| Room Temperature | Store cooled cookies in an airtight container at room temperature. | Up to 5 days |
| Freezer (Baked) | Layer cookies with parchment in a freezer-safe bag or container. | Up to 3 months |
Quick reheating tip: revive a cookie by warming it in a 300°F oven for 3–5 minutes or microwaving for 10–15 seconds (watch closely) — the Butterfinger pieces will perk back up and the cookie will taste freshly baked.
FAQs
Here are quick answers to common questions about baking these peanut butter Butterfinger cookies.
Q1. Why did my cookies spread out and get too thin?
Ans: This usually means the butter was too soft or slightly melted. Aim for butter at room temperature (about 65–68°F) — soft but not greasy. Quick fixes: chill the dough 30–60 minutes before baking, reduce scoop size, or add a few extra minutes of chill time if your kitchen is warm. Also check that you measured the flour correctly (too little flour causes more spread).
Q2. Can I use a different type of candy?
Ans: Yes — chopped candy bars like Reese’s Peanut Butter Cups or Snickers are great swaps and will change the cookie’s flavor and texture (Reese’s boosts peanut-chocolate notes; Snickers adds nougat and caramel). Chocolate chips or M&Ms also work if you prefer more melty chocolate over crunchy Butterfinger pieces.
Q3. How do I know when the cookies are done baking?
Ans: Use visual cues: the edges should be set and just turning golden while the centers remain slightly soft. The cookies will finish baking on the hot baking sheet from residual heat — total bake time is typically 10–12 minutes at oven 350°F. If your oven has hot spots, rotate the sheet halfway through for even browning.
Q4. My Butterfinger pieces melted or lost texture — what did I do wrong?
Ans: If the candy pieces are too small or were crushed in a processor, they can melt into the dough. Hand-chop into roughly 1/4-inch pieces and fold them in at the end to preserve chunks. If you want extra crunchy pieces, add a few more chopped bars after baking while cookies are cooling.
Wrapping Up
There you have it — a simple, satisfying recipe for Peanut Butter Butterfinger Cookies: soft, chewy peanut butter cookies studded with crunchy Butterfinger candy pieces. Makes about 24 cookies; total time with optional chill ~45 minutes.
Try a variation (Reese’s or extra chocolate chips) or make these butter butterfinger cookies for a richer, butter-forward twist. If you bake a batch, save or print the recipe, snap a photo, and share it with #ButterfingerCookies — I’d love to see your results.
If this recipe helped, please leave a rating or comment below and check out related recipes like classic peanut butter cookies or simple butter cookies for more baking inspiration.


